It’s no secret that there is an overwhelming number of fragile items in each home – starting from easily breakable kitchen items (plates, cups, bowls, glasses), going through delicate framed artwork pieces (paintings, pictures) and sensitive electronic devices (TVs, desktop computers, monitors, printers), and ending with various fragile objects around the house such as lamps, mirrors, jewelry, and even fish tanks. Let’s not forget about antique furniture either.
While you’re getting ready to move to another home, one of your most important tasks is to pack your fragile items in a way that they stay well protected until they reach the safety of the destination place. Thus said, the job of protecting the various fragile objects you own and intend to take with you won’t be an easy one.
Ultimately, the only way to be successful when packing fragile items for shipping is to follow a few preparation steps first so that when you start the actual packing task, you’re as ready for the packing challenge as you can be.
Don’t skip these initial steps when packing breakable items for moving:
Step 1: Inventory all your fragile items
Before you can start packing your delicate items for moving, the very first thing you should do is inventory all of your breakables and set aside the ones that will NOT be worth packing and moving to the new home.
The more fragile items you plan to take with you, the more packing supplies you’ll need to keep them safe on the road – meaning that your packing expenses will be higher. Also, more fragile items to move will mean more time spent wrapping them up with paper and bubble wrap.
Go through all the breakables in your home and decide which ones are worth the hassle and which ones are not. Leave behind the delicate things you haven’t used in ages and those with pre-existing damage of some sort.
Step 2: Get the right packing supplies
Packing fragile items for moving is all about knowing which packing materials to use and then how to use those materials effectively to protect your fragile stuff. For example, transferring your kitchen plates directly into boxes without any proper protection whatsoever will end badly… so don’t do it.
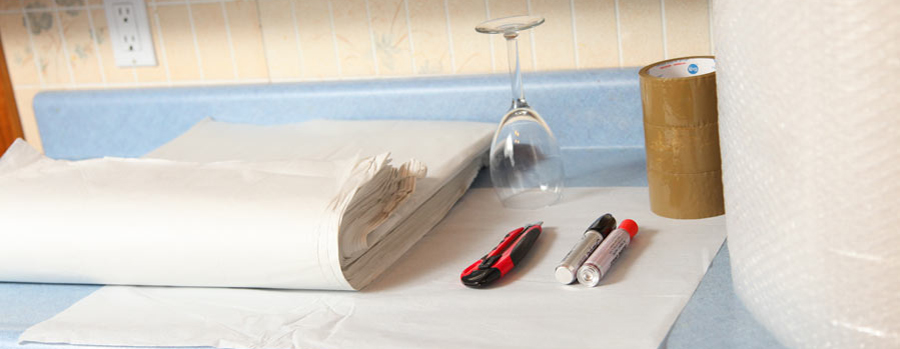
Leaving any of your fragile and breakable items without appropriate protection is not an option so here are the packing supplies you’ll need to pack your delicate items:
Cardboard boxes. Prepare strong, clean and dry cardboard boxes. When packing extra fragile items such as kitchen plates and kitchen glasses, use the so-called dish packs – extra-strong boxes that are double-walled to provide a better overall protection.
Packing paper. You’re going to need plenty of soft acid-free and ink-free packing paper. On average, one pack of 500 sheets of wrapping paper costs around $25.
Bubble wrap. Simply put, bubble wrap is truly indispensable when packing fragile items for a move. Without a doubt, that air-filled plastic wrap will be the best protection for your breakables as the latter are being transported between the two homes. One box of 150 FT of Enviro-Bubble (100% recyclable and reusable) costs around $20.
Marker pens. Get a black marker pen for writing down the contents and destination room on each cardboard box. Get a red marker to mark FRAGILE and HANDLE WITH CARE.
Step 3: Secure the cardboard boxes
Packing delicate items is a delicate business and Moving day accidents could happen even when you’re using brand-new moving boxes. The most common incident when packing and moving fragile items is boxes breaking under the weight of what’s been packed inside them.
Before you start packing your breakables, make sure you tape the bottom and the sides of each cardboard box as an extra precautionary measure. Use high-quality packing tape to strengthen the cardboard boxes from the outside and make them more reliable and safe to hold the various delicate items found in your home.
Also, you should always place a few sheets of packing paper or one sheet of bubble wrap on the inside bottom of each box to create a soft cushion for the extra-breakable things you’re about to arrange inside the cardboard containers.
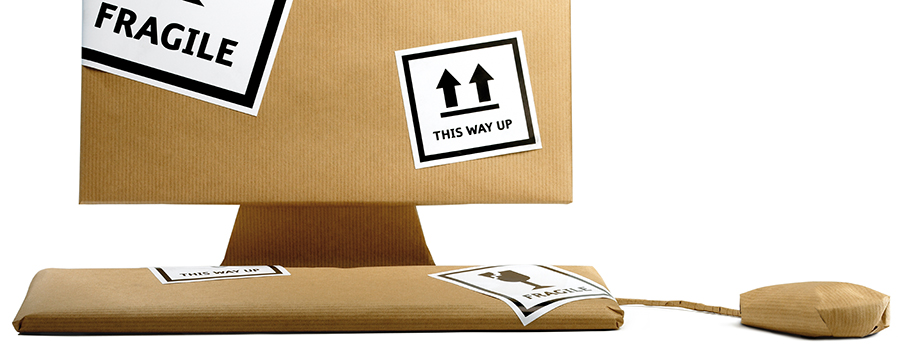
Step 4: Label the boxes with your breakables, always
As a rule of thumb, it’s a mistake not to label a box right after you’ve packed it. Not labeling the cardboard boxes that contain your extra-fragile items is an even more serious mistake even if you do find a good way to remember what you’ve packed in what container.
Labeling the breakables-filled boxes will save you time when you start unpacking in the new home but it’s even more important role is to warn out whoever’s handling those boxes that the contents inside can be easily damaged unless proper caution is exercised.
Use a red marker pen and write FRAGILE and HANDLE WITH CARE on at least 2 sides of each box you’ve packed with fragile items. Of course, you should also add the description of what’s inside the box and its destination room as well – you can use a black marker for those.
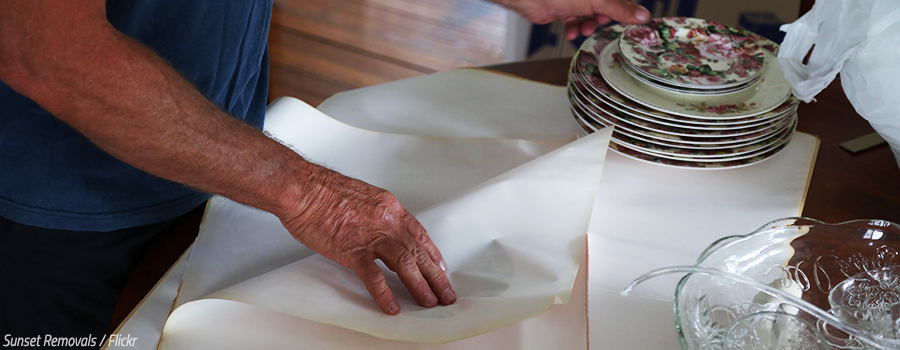
You know perfectly well how easily breakable kitchen plates are – it only takes one wrong move to break a china plate in the blink of an eye. And your mission, should you choose to accept it, is to make sure none of your dishes gets damaged until it gets to the new home’s kitchen.
Here’s the best way to pack plates for moving so that, regardless of the move distance, your highly breakable kitchen items survive the house move in one piece:
GET dish packs, if possible. Dish packs (aka dish barrels) are cardboard boxes with thicker walls that are designed to offer greater protection for your fragile kitchen plates. Standard cardboard boxes will do too but you’ll have to pad them much better before filling them in.
USE tape to reinforce the exterior of the boxes along the seams, their bottoms and sides. Also, pad the inside of each box with crumpled packing paper to create a sufficient insulation layer on the bottom.
PLACE the entire stack of wrapping paper on the kitchen table. If you can’t use the kitchen table for some reason, then you can set your packing station on the floor.
GO through all your kitchen plates and set aside the ones that are damaged in some way, the ones that too worn out to be used again, and the ones you never liked in the first place. Those will be the fragile kitchen pieces you won’t bother packing and moving to the new home’s kitchen.
POSITION a china plate onto the very center of the stack, then pull a couple of paper sheets over it. Do it diagonally from one corner to the next until the entire fragile piece is covered with soft paper. Use pieces of tape to secure the paper bundle.
ADD one extra layer of bubble wrap for your more expensive or valuable kitchen plates to ensure their safety – just wrap the plastic wrap around the paper bundle and tape it in place.
CHOOSE to pack several kitchen plates together to save time and space. In that case, you should use paper plates between the fragile flatware pieces to keep them from coming into contact with one another.
TRANSFER all bundled kitchen plates into the dish pack, one by one, and arrange them standing on their edges, not flat. The heavier kitchen pieces should always go first into the cardboard box, followed by the lighter ones.
FILL in any empty spaces inside the dish pack with pieces of newspaper to make sure nothing moves inside the box during transport. This is an important step from a safety point of view.
CLOSE the lid of the box and tape it shut to finish the process of packing plates for moving. There’s only one final step to go…
LABEL the dish pack using a black marker pen. Write KITCHEN PLATES and FRAGILE on at least two sides of each box.
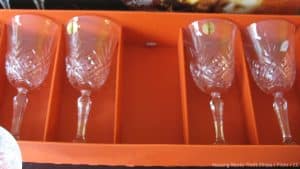
All the glasses you’ll have in your kitchen – from plain drinking glasses to expensive crystal stemware pieces – will have to be well protected while being transported to the new home. Everybody knows that glassware pieces are extremely breakable but it won’t be until you open up a kitchen-bound box after the move and find too many pieces of broken glass inside that you’ll realize just how fragile those glass pieces are.
Don’t let that ever happen to you – discovering unsightly shards of glass when you start unpacking after the move. Just follow some good tips for packing glassware for moving and you should be able to protect your extra-fragile kitchen items on the road.
Here’s the best way to pack crystal glasses when moving to another home:
SORT out your glassware pieces before you wrap them in paper and bubble wrap. There’s really no point in packing and moving glasses that have been damaged or stained over time, or ones that you’ve never liked or used for some reason. Inspect each glass individually and decide what to do with it right there on the spot.
LAY the big stack of wrapping paper onto your pre-determined packing station – preferably the kitchen table.
PLACE a kitchen glass in the very center of that paper stack, then take two sheets from one corner and tuck them carefully inside the glass piece. Do the same thing with the other corners until the breakable item is covered completely in ink-free packing paper.
USE small pieces of packing tape to secure the newly-formed paper bundle – you don’t want the fragile piece to unwrap itself when being moved in the box.
USE bubble wrap to protect expensive glasses – most often crystal ones – or stemware pieces. Position a thick layer of bubble wrap over the entire stem of the glass, then use tape to secure it. To stay on the safe side, wrap the entire glass in a second layer of bubble wrap that will envelop the extra-delicate item entirely and will be over the initial paper sheets.
TRANSFER the protected glassware pieces into a pre-padded and pre-reinforced dish pack. If you don’t have those special cardboard boxes designed for transporting dishes and glasses, then use regular boxes which you’ve padded well in advance – either with crumpled paper or pieces of bubble wrap.
ARRANGE the kitchen glasses with their openings facing downward for increased safety. Also, place them one next to the other in a tight formation.
ADD paper pieces between any open spaces inside the moving box once you’ve filled it in with paper-bundled glassware. Nothing should be shifting inside during the move to avoid untimely breakage.
CLOSE the box and LABEL it properly. Write the HANDLE WITH CARE and FRAGILE warnings in red to encourage whoever’s handling those boxes to be more careful.
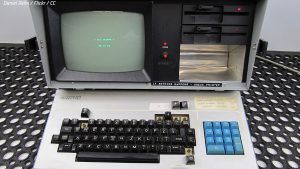
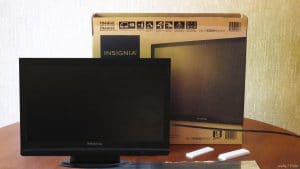
In general, electronic devices are rather sensitive and extremely fragile, especially the ones equipped with delicate screens such as TVs, computer monitors, laptops, tablets, and smartphones. To make things even more complicated, most electronic equipment pieces are extremely sensitive to static electricity and may get damaged if you don’t keep that fact in mind.
There are several important tips for packing electronics for a move – follow them and you shouldn’t have any problems moving your electronic devices to the new address.
BACK UP (always!) your data before packing and moving electronic devices with important files on them. You just never know what can happen during a house move, do you? Transfer the important digital data to an external hard drive, to a USB stick, or to an online storage service.
GET hold of the right boxes when packing electronics for moving. Your expensive devices will be best protected in their original boxes – the ones they came in when you first bought them. Original boxes have been designed to provide the best protection for your fragile electronic pieces so you shouldn’t underestimate that. In case you don’t keep that factory packaging, then just find strong cardboard boxes that are similar in size.
USE pieces of bubble wrap to pad any non-original boxes you plan to use for moving extra-sensitive electronic equipment.
PHOTOGRAPH the way your devices are wired up (usually at the back) before you unplug all those cables. If necessary, use small labels to keep the cables organized and prevent costly mistakes when you get to reconnect them after the move.
PLACE pieces of thick cardboard over sensitive screens or other fragile areas to add an extra level of protection. The cardboard cut-outs should be customized to fit those super-fragile areas of your devices. This is a must-do step when packing your flat-screen TV and your desktop monitor.
WRAP your electronic pieces in soft packing paper first as the first layer of protection. The wrapping paper will protect your electronics from dust and moisture as well.
USE anti-static bubble wrap as the second line of defense for your sensitive and breakable items. Do NOT place bubble wrap directly onto screens or other super-delicate surfaces because it can leave bad stains or worse – damage them.
USE soft furniture blankets to cover your larger electronic pieces – TV, monitor, desktop computer, printer, scanner, etc. Use tape to secure the blanket bundles for the road.
PACK all accessories such as cables, chargers, remote controls, battery packs, etc. in separate cardboard boxes. Make sure you label those containers properly to avoid confusion and hours of wasted time after the move.
CONSIDER purchasing extra insurance for your expensive electronic equipment if you can’t move some of them in your own car. The default “protection” you’ll get from your moving company for free is definitely not enough, so get proper moving insurance through your movers or from a third-party insurance company.
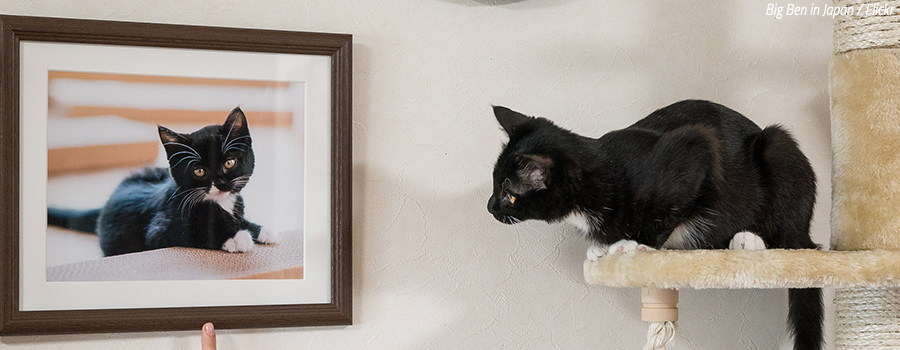
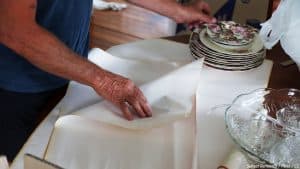
Packing fragile items for moving is never easy – it’s the struggle to protect them properly by using the right packing techniques. And when you’re getting ready to move out, it’s time to turn your attention to all the pieces of framed art in your home – paintings and pictures hanging on the walls and waiting to be taken down and boxed up safely.
Safety should always be in the back of your mind when you’re taking down and packing all the framed art pieces in your home. Interestingly enough, the framed mirrors around the house will need to be packed identically to your paintings and pictures, so you’ll only need to follow one set of steps for packing very fragile items for a move.
HAVE the right types of cardboard boxes ready before you start wrapping up the framed items in your home. Ideally, you’ll get specialized picture moving boxes that 1) can be fitted snugly around the frames of your fragile items because they are adjustable, and 2) are made of thick cardboard just like dish packs. One 4-piece mirror and picture box costs around $8.
SET your packing station on the floor because of the large mirrors and the bigger dimensions of some of your framed art items. If you have a big table to accommodate your packing needs, then that’s even better.
USE a painter’s tape (NOT packing tape) to make a large X on the glass areas of your paintings, pictures, and mirrors. This is easy: just go diagonally from corner to corner (twice) and you’re done. The purpose of that tape X is to prevent any glass shards from flying inside the box in case of breakage, thus damaging the canvas or the photo paper.
CUT out and place pieces of thick cardboard over the X-ed glass sections of your delicate items. The sizes of those cardboard cut-outs should match the outer dimensions of the frames.
WRAP each fragile item – painting, photo, or mirror – with soft and white packing paper the same way you’d pack a gift. Use as many paper sheets as it takes to cover completely each delicate framed piece. Also, tape those sheets together to form nice paper bundles.
USE bubble wrap over the paper layer as the final line of protection. This is particularly important for really expensive or valuable artwork pieces. Tape the sheets of bubble wrap together to keep them from unwrapping.
TRANSFER the protected framed items into the special picture and mirror boxes. Fill in any gaps inside the box with discarded pieces of bubble wrap, then fit the specialty boxes for a snug fit, and then use packing tape to secure the box.
LABEL properly to avoid losing precious time when unpacking after the move. Don’t forget to add the FRAGILE warning too.
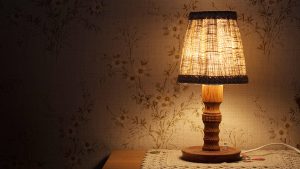
You may not think of all fragile items in your home right away… until you get to pack them. A classic example is the table lamps and floor lamps scattered around your home and present in almost every single room.
Lamps and lampshades are not only breakable – they are also very awkward and challenging to pack safely due to their odd and irregular shapes. The majority of lamps are made of either ceramic or glass, so you’ll surely have to find the best way to keep your various light fixtures safe during transport.
USE, whenever possible, the original boxes of the lamps you’re moving with you. If you don’t keep them (who does?), then use standard cardboard boxes with suitable size and shape.
PLACE pieces of crumpled paper or discarded sheets of bubble wrap on the inside bottom of each box to form a soft cushioning bed for your fragile lamps.
DISASSEMBLE your lamps in order to keep them safe during the haul. Lamps come in many designs but most of them have these three basic elements: lampshade, harp, and light bulb. So, you’ll only need to figure out how to take those three things apart so that you can protect them separately.
REMOVE the lampshade, take out the U-shaped metal or plastic harp, then unscrew the light bulb. It sounds easy but it can be anything but that.
SECURE the lamp cable either by using a cable tie or by coiling it around the base of the lamp.
PACK the lamp base with several sheets of packing paper, then wrap it up with bubble wrap to provide the best protection possible. Do not use tape directly onto the delicate surface of the lamp. Do the same with the harp and the lampshade.
TRANSFER carefully the lamp into the ready box, upright and with its base down. If you’re not using the original boxes and the substitute cardboard box is big enough, you can try and fit more than one lamp in a box as long as they are well isolated with paper and cannot touch one another.
KEEP the various elements of a lamp together inside one box for easy reassembly… except the lampshades. Shades are extremely fragile so you’re going to have to pack them in a separate moving container.
FILL in any gaps inside the boxes with paper (newsprint is ok) so that nothing moves during the actual transportation. Packing fragile items for shipping means keeping them safe all the way.
LABEL properly the boxes that contain lamps, mark them as FRAGILE as well.
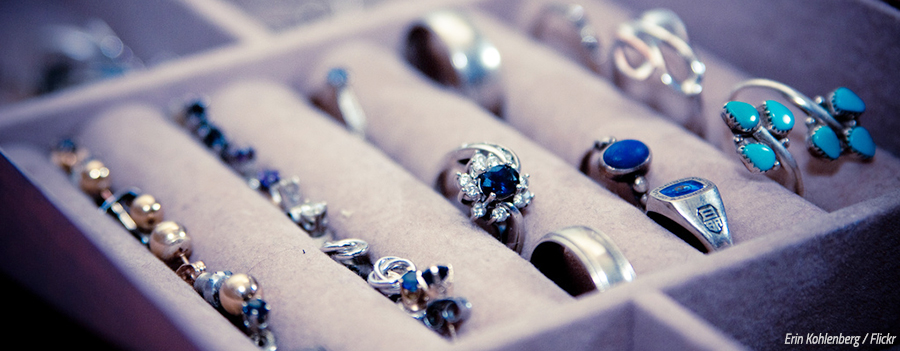
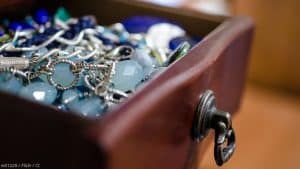
The task of packing jewelry for moving will present a number of difficulties for you. For starters, most of the jewelry pieces you own – necklaces, bracelets, earrings, and rings – will be expensive and valuable, so you’ll need to make a real effort to protect your own body ornaments during a rather chaotic period such as a house move.
Secondly, some of the jewelry pieces will be very small, so it’ll be relatively easy to lose them during the haul. And thirdly, in most cases, jewelry items can be really fragile and delicate, so improper packing may lead to costly breakage, usually after getting entangled in one another.
Here are some great packing tips for packing jewelry when moving:
SORT out all your jewelry pieces before packing, one by one. Use a large and flat surface, like a big table, to do the sorting task. Separate your jewelry by type, then optimize your jewelry collection. Consider discarding any pieces that are broken beyond repair, too worn out to wear again or simply too cheap to bother packing them for the move.
GET packing paper (never newspapers), bubble wrap and plastic wrap prior to packing your jewelry. Also, you’ll need some clean cardboard sheets, plastic bags that seal well (Ziploc bags) and some packing tape. Now, it may sound a bit weird, but make sure you also have drinking straws, clean rolls of toilet paper, egg cartons, pill organizers, and rubber bands.
USE, if possible, a jewelry box to transport your precious jewelry items. By design, jewelry boxes are perfect for storing AND moving jewelry of various types, so yes, if you have one, make sure you use it.
PROTECT your NECKLACES by slipping their long chains through drinking straws (for thin chains) or clean toilet paper rolls (for thick chain), then secure them at their ends. The major issue when moving necklaces is that their long and thin chains get entangled in each other and can break as a result. Wrap the secured necklaces with plastic wrap, then use packing paper as a second layer of protection. Secure with tape, then arrange the paper bundles in small boxes such as shoe boxes.
PROTECT your BRACELETS by wrapping them in soft packing paper. For ones with single elegant chains, you can use the drinking straw packing technique described above. Use pieces of bubble wrap to protect any delicate parts of your bracelets (gemstones, for example), but use the air-filled plastic material over the paper layer. Finish with plastic wrap to keep the bundles tight and immovable.
PROTECT your EARRINGS by sliding their hooks through cardboard cut-outs, then wrapping them in plastic wrap for fixation, and finally using soft packing paper to protect the entire package. For small stud earring, wrap them in white packing paper, then arrange them into pill organizers or hard cases for sunglasses to keep them from getting lost during the move.
PROTECT your RINGS by wrapping each one in soft packing paper, then placing it into an egg carton cup, filling any empty spaces with extra paper for perfect immobilization, and finally wrapping the entire carton with stretch wrap when you’ve placed all your rings. Another good way to pack rings for moving is to wrap them in wrapping paper and then place each one into a day-of-the-week pill organizer.
It’s not easy to learn how to pack fragile items simply because the delicate things under one’s roof can be too many to count… and too different in nature to use a single universal packing technique. Kitchen plates are packed for a move rather differently than jewelry pieces, and sensitive electronic devices should get protected for the haul in different ways than antique furniture items.
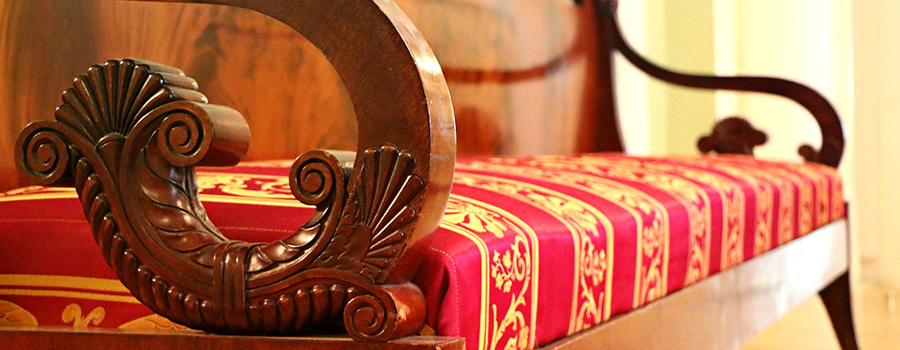
Packing antique furniture for moving is not an easy task as those pieces are way more valuable and fragile than ordinary furniture items. Yes, you can still manage it just fine by following the furniture packing steps:
INVENTORY your antique furniture pieces and write down any relevant information about each one – production year, place of manufacturing, material, first owner, approximate value, etc. Note the current condition of each antique furniture piece you own and photograph it from all sides and various angles as proof of its actual condition. The photos will be very useful in case of damage to any of the furniture pieces during transport.
MAKE your antique furniture pieces lighter and less prone to damage by removing their contents – that is, anything that’s inside them. Remember that any extra weight might compromise the safety of your task.
REMOVE, whenever possible, any detachable furniture elements such as doors, legs, glass shelves, etc. Pack any disassembled furniture parts separately for increased safety.
SECURE any loosely attached elements of your antique furniture so that those elements – such as doors or drawers, for example – don’t open accidentally during transport. NEVER EVER use packing tape directly onto the super-delicate finish of your antique items. If you do, then you may ruin them forever. Instead, you can either use special-purpose shrink wrap like professional packers and movers, or use standard packing tape over furniture blankets.
CREATE the first layer of protection by using a combination of soft wrapping paper and bubble wrap. The goal of this initial protection is to keep the super-delicate finish of your antique furniture from damage such as scratches, dust, dirt, loss of paint or moisture. Always use the soft, ink-free and acid-free packing paper first, then wrap the bubble wrap over it to protect the most fragile areas of your furniture.
CREATE a shock protection for your delicate antique furniture by wrapping the pieces in thick furniture blankets and securing them with tape. One thing is certain – your valuable items will be subjected to shocks and vibrations during the move so you’ll need those moving blankets around them to absorb those harmful movements.
CREATE the third protective layer – the hard outer protection – by cutting out large sheets of thick cardboard and placing them over the areas of your antique furniture pieces that you think will be at risk during the move. Then, secure those cardboard cut-outs using pieces of tape. Although cardboard does not offer the same type of protection as custom-made crates, for example, it should still be enough to keep your valuable antique furniture items safe, especially when it’s combined with the protective power of packing paper, bubble wrap, and furniture blankets.
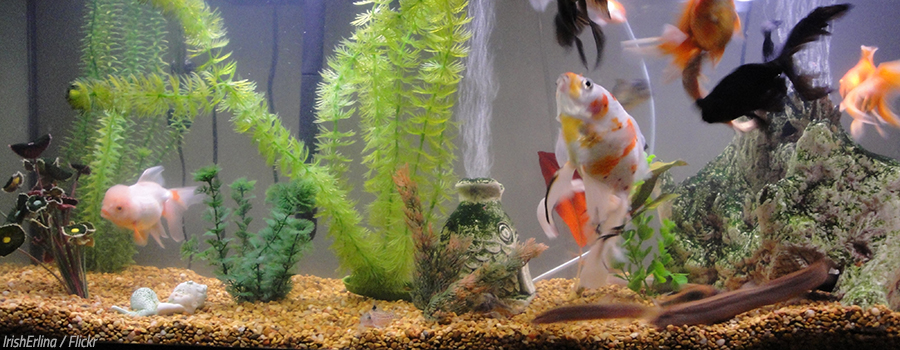
Another extra-fragile item that you may have in your home is a fish tank made of easily breakable glass. Now, an aquarium full of lovely fish is a great thing to have and enjoy and marvel at… until you have to move it to another house. So, you’ll need to know how to protect your delicate fish tank so that it remains intact throughout the move.
Let’s assume that you’ve already prepared your fish for transport and have transferred them safely into suitable containers for transport so that now you can turn your attention to their original glass home. If you haven’t, here you can find the detailed steps on how to prepare fish for moving.
These are the steps on how to pack a fish tank for a move:
DRAIN all the tank water into perfectly clean 5-gallon buckets. Use a siphon hose to complete this important step – you want to make sure that you take with you as much of the fish tank water as you can.
TAKE OUT carefully any decorations found in the fish tank – rocks, rock castles, artificial plants, signs, etc. Dry those fish tank decorations, wrap each one with soft packing paper, then place them into a suitable cardboard box. Wrap the extra-fragile ornaments with one thick layer of bubble wrap over the paper one.
REMOVE carefully all types of fish tank equipment and accessories – heaters, pumps, light fixtures, filters, etc. Dry them well and then wrap them completely in white packing paper, followed by one layer of bubble wrap. Transfer all those aquarium equipment pieces into a cardboard box and label that moving container properly.
REMOVE all sand or gravel from the bottom of the fish tank. This step is all about ensuring the safety of the entire fish tank moving operation – the additional weight of that sand or gravel is likely to damage the glass structure if you try to lift it and move it without making sure it’s completely empty first. Transfer that sand or gravel into a bucket for easier and safer transportation.
USE a vacuum cleaner to clean well the empty glass aquarium, then use a soft dry cloth to dry it up.
PROTECT the fish tank for the road by wrapping it in 3 protective layers: 1) white wrapping paper, 2) bubble wrap, and 3) thick furniture blankets. Use pieces of tape to secure each separate layer and to keep it from unwrapping during the move itself.
KEEP the fish tank as level as possible during the haul. Make sure it can’t move around when you load it into the moving vehicle.
Joshua Green is a relocation expert and a moving industry professional, one of the esteemed contributors to MyMovingReviews.com with specialized articles and informative guides which help people organize and execute their moves easily and comfortably.
Joshua is a recognized author of two books about moving one of which is Relocating Without Breaking A Sweat - Your Personal Handbook For A Perfect Move. Both books are well received and help thousands of people make the right relocation decisions.
He is known to skillfully incorporate his never-ending energy, utmost dedication and raw passion into his works.
You can contact Joshua Green at: joshua@mymovingreviews.com | Linkedin
*At MyMovingReviews we will connect you with a professional moving company. Please note that we may not be affiliated with
and you may be speaking with another licensed provider.
We use cookies to optimise your experience.Accept and close or Learn more